
Showing posts with label Christmas. Show all posts
Showing posts with label Christmas. Show all posts
Thursday, November 27, 2014
Adorable Glass Necklaces and Magnets
Hi Friends!
The holidays is the season to give. Why shortchange yourself the blessing of giving just because you are money poor? Today I will show you how to make darling gifts that cost you hardly anything to make, but is boutique quality and looks like you spent a mint.

Aren't these necklaces adorable! They look like the kind you can buy from a gift shop or boutique.


The first are necklaces that I made using flat glass bubbles that I found at the craft store. They are a little over an 1 inch across.
The stamps used are all DeNami Design stamps. There are so many to choose from for all occasions. You can even use a portion of a stamp because you will just punch it out.
2) Then I took a 1 inch circle punch MV-01 to cut out the images to fit behind the glass bubbles.
3) I added a small amount of 3D Crystal lacquer CL01 to the back of the glass bubble and then slowly pressed on the stamped image, making sure it was tightly pressed onto the back of the bubble with no air bubbles. Make sure you don't put too much as it will ooze behind the punch out and will need to be wiped off.
4) Allow to dry completely.
5) Glue on necklace bails using a E-6000 adhesive or similar that can attach metal to the glass.
6) Thread the chain in the bail after it is dry and package your necklace.
The holidays is the season to give. Why shortchange yourself the blessing of giving just because you are money poor? Today I will show you how to make darling gifts that cost you hardly anything to make, but is boutique quality and looks like you spent a mint.
Aren't these necklaces adorable! They look like the kind you can buy from a gift shop or boutique.
Here are the necklaces with the cardstock backing attached.
Here are the necklaces in the 3x3 clear boxes
You can make magnets instead. Just attach a magnet instead of the bail and chain.
Here are the magnets close up
The first are necklaces that I made using flat glass bubbles that I found at the craft store. They are a little over an 1 inch across.
Supplies Needed to Make Glass Pendant Necklaces
-Markers (Tombow) if using Versafine or Copic if using Memento
-Necklace Bails
-Ball necklaces or chains
Optional: Strong Circle magnets if you prefer to make magnets
How to Make the Glass Pendant Necklaces
1) First I stamped my stamp images in Versafine TK-VF082 and colored with markers. You can use Memento TK-ME900 if you are using Copic markers.The stamps used are all DeNami Design stamps. There are so many to choose from for all occasions. You can even use a portion of a stamp because you will just punch it out.
2) Then I took a 1 inch circle punch MV-01 to cut out the images to fit behind the glass bubbles.
3) I added a small amount of 3D Crystal lacquer CL01 to the back of the glass bubble and then slowly pressed on the stamped image, making sure it was tightly pressed onto the back of the bubble with no air bubbles. Make sure you don't put too much as it will ooze behind the punch out and will need to be wiped off.
4) Allow to dry completely.
5) Glue on necklace bails using a E-6000 adhesive or similar that can attach metal to the glass.
6) Thread the chain in the bail after it is dry and package your necklace.
How to Package the Glass Necklaces
1) Cut out White Cardstock PC21 into a hair less than 3x3 inch squares
2) Stamp I62 For You Circle in Black ink in the middle of the cardstock.
3) Add a strip of ATG100 adhesive in the middle of the I62 For you Circle and attach pendant.
4) Put the chain in a little baggie and attach the bag to the back of the cardstock with ATG100.
I had to fold over the little bag to make it smaller to fit.
5) Add a strip of ATG100 to the back of the cardstock, both top and bottom and slide
it into the 3x3 clear box. The adhesive will prevent the necklace and card from moving around too much.
I will do another post on how I wrapped these necklaces for a gift. Stay tuned!
Enjoy giving these away!
Nami

Thursday, November 20, 2014
Silent Night Card
Hello DeNami friends!
Living in the Northwest, I love the trees that we are surrounded with. My favorite sights are when the trees have dustings of snow and the sun is glistening in the snow. The coolness of the air reminds me of the warmth that is awaiting me in my home. Usually it is a hot cup of tea with cream and sugar in my favorite tea cup.
Today Lisa E made a Christmas card that was a reflection of nature. The trees were in their simple beauty without the fanfare that are saved for the department stores and movies. I love how she captured the majestic beauty of nature and used the Silent Night stamp to share a powerful, yet simple message.
Her use of different shades of green were very attractive and lends itself to simple stamping. You can easily dress up this card with colorful rhinestones, sequins and dots of color. You can even switch it out and stamp the trees in VersaFine Onyx Black and VersaFine Smoky Gray for the same monochromatic look in the grey and black hues. You can add touches of silver to embellish with. Use your imagination to create your own Silent Night card. These stamps are classics and will be in season for many years to come.


Hello and welcome back to the DeNami blog! Lisa E. here today to bring you yet another of the newly release Christmas stamps!
I wanted to make something a bit more elegant with this stamp. I began the card with some generation stamping of the Medium Pine. Next I heat embossed the new Silent Night Holy Night sentiment with Versa Mark ink and gold embossing powder. I added my stamped panel to a shimmery gold panel and then to a white card base. And finally I sprinkled about several 4mm Metallic Gold Sequins from Pretty Pink Posh. Quickly created and flat for mailing, a win win!!

Living in the Northwest, I love the trees that we are surrounded with. My favorite sights are when the trees have dustings of snow and the sun is glistening in the snow. The coolness of the air reminds me of the warmth that is awaiting me in my home. Usually it is a hot cup of tea with cream and sugar in my favorite tea cup.
Today Lisa E made a Christmas card that was a reflection of nature. The trees were in their simple beauty without the fanfare that are saved for the department stores and movies. I love how she captured the majestic beauty of nature and used the Silent Night stamp to share a powerful, yet simple message.
Her use of different shades of green were very attractive and lends itself to simple stamping. You can easily dress up this card with colorful rhinestones, sequins and dots of color. You can even switch it out and stamp the trees in VersaFine Onyx Black and VersaFine Smoky Gray for the same monochromatic look in the grey and black hues. You can add touches of silver to embellish with. Use your imagination to create your own Silent Night card. These stamps are classics and will be in season for many years to come.
Here is Lisa's instructions on making this gorgeous card:
Wednesday, November 19, 2014
Penguins in Igloo Card
Hi DeNami friends!
They say less is more, which sometimes really is true. This card uses the less is more technique and gives lots of impact with simple details. Lisa E chose some colors to make this monochromatic card POP! I love how she colored the penguins so that their bellies stood out. Such a delightful card and will make your recipients smile.
The Penguins in Igloo stamp is very versatile. You can cut out the penguins and make them pop. You can also stamp several and cut out a whole flock of them to be in the middle of a glacier background having fun.
What will YOU do with the Penguins in Igloo stamp? It will be so fun to see your creations.
Here are Lisa's instructions:
Hi there! Lisa E. here and I have another card today featuring yet another of the new DeNami Design Christmas stamps. This one is called Penguins in Igloo and it's super duper cute!


I've added a piece of patterned paper to a white card base after die cutting the bottom edge with a Stitched Borders 1 Die from Pretty Pink Posh. Next I stamped the new image onto a scrap of white cardstock and trimmed it out. I stamped portions of the igloo again on scraps so they could be popped up. After coloring my penguins I added the image to the card with foam tape. I just love the way this previously released Whimsical Merry Christmas sentiment looks here! To finish things off I added some Stickles to the Santa hats, igloo and star centers.

They say less is more, which sometimes really is true. This card uses the less is more technique and gives lots of impact with simple details. Lisa E chose some colors to make this monochromatic card POP! I love how she colored the penguins so that their bellies stood out. Such a delightful card and will make your recipients smile.
The Penguins in Igloo stamp is very versatile. You can cut out the penguins and make them pop. You can also stamp several and cut out a whole flock of them to be in the middle of a glacier background having fun.
What will YOU do with the Penguins in Igloo stamp? It will be so fun to see your creations.
Here are Lisa's instructions:
Hi there! Lisa E. here and I have another card today featuring yet another of the new DeNami Design Christmas stamps. This one is called Penguins in Igloo and it's super duper cute!
I've added a piece of patterned paper to a white card base after die cutting the bottom edge with a Stitched Borders 1 Die from Pretty Pink Posh. Next I stamped the new image onto a scrap of white cardstock and trimmed it out. I stamped portions of the igloo again on scraps so they could be popped up. After coloring my penguins I added the image to the card with foam tape. I just love the way this previously released Whimsical Merry Christmas sentiment looks here! To finish things off I added some Stickles to the Santa hats, igloo and star centers.
Tuesday, November 18, 2014
Chickie Christmas Tag
Hello DeNami friends,
Sometimes you don't have much time to make Christmas cards or you opt to do photo greeting cards, but still want to create something that is from the heart. Tags are a great way to go! You can use them to top off gifts, tie them on a gift basket, on a mug handle or top a cellophane wrapped plate of cookies.
This "No Peeking Chickie" is perfect for making tags. You can also use it to stamp on brown craft shipping paper or on lunch sacks to wrap gifts in.
Our own DT, Lisa E, will share how she made this adorable tag.


Lisa writes:
Hello DeNami friends, Lisa E. back today with another of the newly released Christmas stamps. Today my project features the No Peeking Chickie Circle. I think this little cutie is perfect for your holiday tags!
What a I love about this stamp is that the center circle surrounding the chickie is the perfect size for a one inch circle punch. I stamped the image twice punching one chickie out and popping it up with a thick foam dot. Next I die cut the entire image with a larger stitched circle. I added the Stitched Circle image that fits just inside the die cut stitches. I was a wee bit off on my placement, but I think it still looks cute!
Once all of my stamping and coloring was done I added everything to a pair of large stitched tags (Stitched Duos) by Pretty Pink Posh. A little grosgrain ribbon and a snippet of twine complete my design!

Sometimes you don't have much time to make Christmas cards or you opt to do photo greeting cards, but still want to create something that is from the heart. Tags are a great way to go! You can use them to top off gifts, tie them on a gift basket, on a mug handle or top a cellophane wrapped plate of cookies.
This "No Peeking Chickie" is perfect for making tags. You can also use it to stamp on brown craft shipping paper or on lunch sacks to wrap gifts in.
Our own DT, Lisa E, will share how she made this adorable tag.
Lisa writes:
Hello DeNami friends, Lisa E. back today with another of the newly released Christmas stamps. Today my project features the No Peeking Chickie Circle. I think this little cutie is perfect for your holiday tags!
What a I love about this stamp is that the center circle surrounding the chickie is the perfect size for a one inch circle punch. I stamped the image twice punching one chickie out and popping it up with a thick foam dot. Next I die cut the entire image with a larger stitched circle. I added the Stitched Circle image that fits just inside the die cut stitches. I was a wee bit off on my placement, but I think it still looks cute!
Once all of my stamping and coloring was done I added everything to a pair of large stitched tags (Stitched Duos) by Pretty Pink Posh. A little grosgrain ribbon and a snippet of twine complete my design!
Friday, November 14, 2014
Candy Cane Chickie Treats
Hi DeNami friends,
It's not too early to begin your holiday and Christmas gift making. You can use these delightful stamps to make sweet gifts, but also matching cards. With rubber stamps, you can create gifts at your fingertips!
We are happy to share with your Tammy's happy projects. We love the color and cheer that these bring. Why not make them for your co-workers, teachers, neighbors or friends? When you order the clear boutique boxes, why not order a few extra for those times you need a quick little gift. Also, they are perfect for wedding and shower favors.
We are happy to share with your Tammy's happy projects. We love the color and cheer that these bring. Why not make them for your co-workers, teachers, neighbors or friends? When you order the clear boutique boxes, why not order a few extra for those times you need a quick little gift. Also, they are perfect for wedding and shower favors.


Here is how Tammy made these sweet treats in her own words:
It's Tammy, and I have a little "treat" to share with you here on the DeNami Blog!
I used the CB400 Clear Boutique Boxes
that come 10 to a pack and filled them with some festive Hershey
Kisses! I added a length of red grosgrain ribbon around the box
vertically and secured with hot glue. Next I used a snowflake Rosette
die to create my focal point for the treats.
The real show stopper is our new friend Candy Cane Chickie which I stamped inside a snowflake. After I colored him in, I used the Quickie Glue Pen to add Blue Ice Glitter to his hat and the edges of the snowflake. Once dry he was secured to the center of the rosette and added to the treats.
Voila,
ready for gift giving this season. These make awesome little teacher
gifts for the holidays especially if you have multiple to buy for. They
are inexpensive to create.
Be sure to check out the new release ~ HERE
Thanks for stopping by and have a Fantastic Friday!
~Tammy~

Thursday, November 13, 2014
O Holy Night Card
Although Christmas is a time of festivities, joy, presents, family and friends, there is also the quietness of celebrating the Holy Day, aka, holiday. The day we designate to celebrate the birth of Christ.
Our new Nativity Silhouette is simple, but also powerful in message. The message that the simple birth of a baby came to bring salvation to all mankind.
Lisa did a fabulous job letting the simplicity speak for itself. You can change out the background color to match your style. You can also do a reverse using a resist technique. Experiment and have fun with this inspirational project.
Our new Nativity Silhouette is simple, but also powerful in message. The message that the simple birth of a baby came to bring salvation to all mankind.
Lisa did a fabulous job letting the simplicity speak for itself. You can change out the background color to match your style. You can also do a reverse using a resist technique. Experiment and have fun with this inspirational project.


Here is Lisa's instructions on how you can make this yourself. This is in Lisa's own words:
Today I’m sharing a card that features two gorgeous new images for the holiday season: CL-F248 Nativity Silhouette and CL-F246 O Holy Night.
I started by cutting a 2.5” x 3.5” panel from white cardstock. I then used
an ink blending tool and distress inks to create a night sky for my background.
I set the panel aside to dry. While the panel was drying, I created a 5.5” x
4.25” card base from white cardstock and rounded the top right-hand corner. I
stamped the CL-F246 O Holy Night sentiment with TK-VM001 VersaMark ink and
embossed it in gold. It’s absolutely stunning! I then took a ruler and a
VersaMark Pen, traced a line at the bottom edge of my card base, and embossed
that in gold as well. Fun!
Once my night sky panel was dry, I stamped the CL-F248 Nativity Silhouette
image with TK-VF082 Onyx Black Versafine ink onto the bottom of the panel and
embossed it using clear embossing powder. I inked up one of the stars from I40 Moon & Stars with TK-VM001 VersaMark ink, stamped it up above the nativity
scene and embossed it in gold. I adhered the finished panel to the card. As a
side note: I really found myself wishing I had the E65 Star of the East image,
which would have been the perfect star for this particular scene. But don’t
worry, I will be ordering it soon!
I hope you like my creation for today and feel inspired to make some
holiday cards and projects!
Supplies:
Ink: TK-VF082 Onyx Black Versafine (Tsukineko), TK-VM001 VersaMark
(Tsukineko)
Distress Ink: Spiced Marmalade, Picked Raspberry, Seedless Preserves (Tim
Holtz)
Cardstock: White (Papertrey Ink)
Embossing Powder: Clear (American Crafts), Queen’s Gold (Ranger)
Other: VersaMarker (Tsukineko)
Tool: Crop-A-Dile Corner Chomper (We R Memory Keepers)

Tuesday, November 11, 2014
No Peeking Chickie Tag
No Peeking Chickie Tag
Hi DeNami Friends!Our DT's have been working up a storm with our latest seasonal collection. As the weather is getting colder, it is a reminder of the holidays coming up.
Lisa Petrella created this wonderful "No Peeking Chickie Tag" using the new CL-F245 No Peeking Chickie.


Here are some simple instructions on creating this adorable little tag as shared by Lisa:
I stamped the CL-F245 No Peeking Circle Chickie with TK-ME900 Tuxedo Black Memento ink onto white cardstock and colored him with markers. I then used a
circle die to cut out the image. I die-cut two tags, one from white cardstock
and one from black cardstock. I stamped the N133 Polka Dot Background with
TK-VF082 Onyx Black Versafine ink onto the white tag and set the white tag
aside. On the back of the black tag, I measured 1.25” from the top and drew a
pencil line. I then cut along that line with scalloped edge scissors and adhered
this “topper” to the top of the white tag with glue. I cut the bottom 0.5” from
the black tag and adhered that to the bottom of the white tag with glue.
I added the No Peeking Circle Chickie to the tag with a foam tab and added a
touch of SS02 Extra Fine Sparklets Glitter to the fuzzy parts of his hat. To
finish up, I tied on some red and white twine from the TW005 Classic Twine
3-pk.
I hope you like my holiday tag featuring the new F245 No Peeking Circle
Chickie!
Supplies:
Markers: Copic Sketch Markers
Cardstock: White (Papertrey Ink), Black (DeNami Design)
Dies: Small Standard Circles (Spellbinders), Tag Sale #1 (Papertrey
Ink)
Baker’s Twine: TW005 Classic Twine 3-pk (DeNami Design)
Adhesives: GL01 Quickie Glue Pen (Sakura), 3D Foam Tabs (Tombow), Mono
Multi Liquid Glue (Tombow)
Other: Scalloped Edge Scissors

Wednesday, November 5, 2014
Eskimo Friends Tags
Hello DeNami Friends!
It's good to be back posting on our blog again!
As you know, we released some new stamps last month, and Design Team Member Tammy is here today to share a complimenting tag and card combination using two of the new images just released.


It's good to be back posting on our blog again!
As you know, we released some new stamps last month, and Design Team Member Tammy is here today to share a complimenting tag and card combination using two of the new images just released.
She
started by using a scallop circle die and creating a shaped card using a
butter yellow cardstock. She then took white cardstock and die-cut a
circle onto which she stamped her Eskimo Friends image directly to the center using Tuxedo Black Momento Ink. Once the ink dried, she colored the image in with Copic markers. Using the Quickie Glue Pen, she drew lines under her image and added Blue Ice Glitter which
is a quick way to add a little snow scene. She added little glitter
touches to her image to give a little more sparkle and shine. Lastly
all that she had to do, was stamp her Tidings of Joy sentiment just above her stamped image and add to the scallop circle card base.
Tammy followed the same process for her tag, just adding a hole at the top for her ribbon which she embellished with yellow and white twine.
You can find all the new products in the new release HERE!
Be sure to follow and like our Facebook Page HERE!
Find us on Flickr HERE!
More inspiration on Pinterest HERE!
Thank you for stopping by!
Monday, December 23, 2013
Washi Tape Wreaths + GIVEAWAY

Greetings, DeNami friends!
It's Emily here with my December edition of Ways With Washi! Today I thought I'd show you a couple of ways that you can use washi tape to build your very own DIY wreath embellishments. Let's take a look!
For my first project, I used two green DeNami washi tapes to build a wreath. I started by punching out two nesting circles from white card stock. Then I used scissors to trim fringe along one side of a long strip of Green Graph Washi Tape and adhered it around the perimeter of the larger circle with the fringe pointing outward. I gave the same fringe treatment to a long piece of Green Stripes Washi Tape and adhered
it around the smaller circle. After stacking the smaller fringed circle on top of the larger circle, I filled the center of my wreath with a tiny sentiment from the Christmas Greetings Petit Four stamp set. At this point, I simply added a few red sequins and a loopy bow tied from baker's twine, and my wreath embellishment was done!

I love pairing pink with green as a nontraditional color scheme for Christmas! Next up is a larger wreath created with my favorite Christmas color combo. For this wreath, I adhered strips of Pink Stripes Washi Tape and Green Graph Washi Tape around a cardstock ring created with punches. Once all of the tape was securely fastened in place, I used my trusty scissors to trim swallowtail notches in the end of each little banner. Sweet, don't you think?

And that brings this Ways With Washi to a close! It's so hard to believe that this is my last DeNami monthly feature for 2013. It's also my last Ways With Washi feature. I've nearly exhausted my list of interesting ways to use washi tape in papercrafting projects! But never fear, I'll be back with a brand-new monthly feature here on the DeNami blog in 2014!

Thanks for checking out Ways With Washi today!

Wednesday, December 18, 2013
Pin-spired Finale
The countdown is on: 7 days until Christmas!
Today is the last Pin-spired post here on the DeNami blog and while it's sad to see this feature come to an end, we have a new one that we will be announcing in January and premiering in February. This is where YOU, our amazing DeNami customers, will get a chance to be in the spotlight. I can't spill all the details yet, but let's just say you'll want to break out your DeNami stamps and start sharing your creations!
We have a bright and cheery inspiration photo that is so amazing and inspiring. How yummy are those pinks and reds together? That packaging is so amazing- it's like two gifts in one!
Let's take a look at what the design team created, shall we?


Emily Keaton
For a list of the supplies used on this card and details, visit Emily's blog
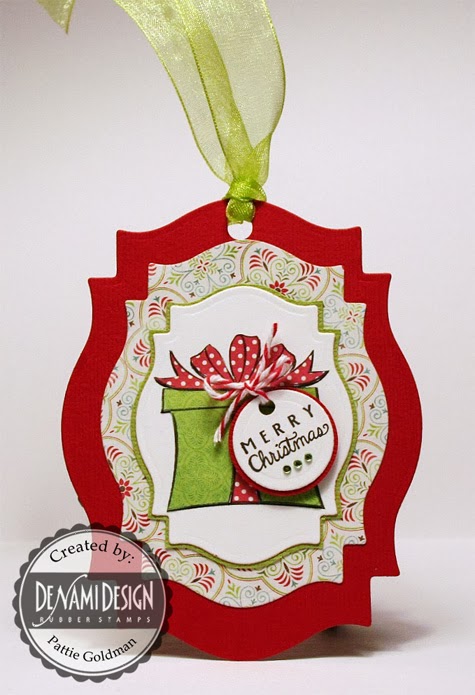
Pattie Goldman
For a list of all the supplies used on this card, visit Pattie's blog.

Lisa Elton
For a list of the supplies used on this card and details, visit Lisa's blog
For a list of the supplies used on this card and details, visit Lisa's blog

Tammy Hobbs
For a list of the supplies used on this card and details, visit Tammy's blog
For a list of the supplies used on this card and details, visit Tammy's blog


If you would like to take a look at all of the Pin-spired photos we have done in the past, I've posted them on a Pinterest board. This board is full of inspiration and if you click on a specific photo, it'll take you directly to the coordinating DeNami post, with samples from the team.
I'm so glad you stopped in to the DeNami blog today. Enjoy the rest of your Wednesdsay!

Friday, December 13, 2013
Snowman Boxes Tutorial by Wendy

Happy Friday!
With Christmas just 12 days away, we know that the days are running out to create Christmas items. If you're anything like me this year, you're a little behind and quick and easy are keywords these days. Thanks to Wendy, we have a quick and easy Photo Tutorial to share today!

DeNami Design Products
Other Products
Sharpie marker
black and orange cardstock
1/2" circle punch
small hold punch
scissors
ribbon


Have
you been following along with the Photo Tutorials? If you have missed any of them, CLICK HERE.
Whether you need some inspiration, want to learn new techniques or just
need a refresher course in crafting, this is the perfect resource.
Today we have the DeNami Christmas Party and I cannot personally wait for our gift exchange! I hope you all have a wonderful Friday, we'll see you back here on Monday!

Subscribe to:
Posts (Atom)

Follow Us

 |
 |
 |
 |
 |


