
Showing posts with label diy card. Show all posts
Showing posts with label diy card. Show all posts
Monday, October 5, 2015
Starbucks Inspired Card Project
Hi Friends,
It's Pumpkin-everything season! I must admit it was hard to say goodbye to summer, until I started thinking of pumpkin flavored treats, sweater weather, wearing cozy scarves and wearing boots again. With the changing of the guard, season's wise, comes the changing of Starbucks flavors and their fun cups.
Lisa decided to make a fun project of the decorated cup she got at Starbucks. I love what she did with the project and how she interpreted the art into a card form using DeNami. This would be a fun challenge to do.
Read about her project here:
Hey there! It’s Lisa P. My husband and I recently stopped in our local Starbucks on a chilly morning to pick up a tea and coffee. When I saw their new Autumn-themed cups, I squealed with delight. They are so festive and fun, and they are the inspiration behind my card for today.
Here’s the cup:

And here’s my card:

I stamped the images from the PF21 Autumn Stamp Set on the bottom portion of a blank white card. I masked off the images with some stamping mask paper and then stamped the J16 Small Splatter over top. I removed the masks and added bits of yellow, orange, red, and brown color to the images with markers. I also added some small dots to the images with a fine-tip black pen---a fun little detail that I noted about the images on the cup. To finish, I stamped the E144 Thankful For You sentiment and rounded all four corners of my card base.
Here’s a look at the card and cup together:

I had so much fun creating this card and absolutely LOVE how we are surrounded by inspiration in our everyday lives! I hope you like what I’ve shared today. Thanks so much for visiting!
DeNami Design Supplies:
Stamps: PF21 Autumn Stamp Set, E144 Thankful For You, J16 Small Splatter
Ink: TK-VF082 Onyx Black Versafine (Tsukineko)
Cardstock: PC21 White Cards
Other Supplies:
Black Dye Ink, Markers, Pen, Corner Rounder, Stamping Mask Paper

It's Pumpkin-everything season! I must admit it was hard to say goodbye to summer, until I started thinking of pumpkin flavored treats, sweater weather, wearing cozy scarves and wearing boots again. With the changing of the guard, season's wise, comes the changing of Starbucks flavors and their fun cups.
Lisa decided to make a fun project of the decorated cup she got at Starbucks. I love what she did with the project and how she interpreted the art into a card form using DeNami. This would be a fun challenge to do.
Read about her project here:
Hey there! It’s Lisa P. My husband and I recently stopped in our local Starbucks on a chilly morning to pick up a tea and coffee. When I saw their new Autumn-themed cups, I squealed with delight. They are so festive and fun, and they are the inspiration behind my card for today.
Here’s the cup:

And here’s my card:

I stamped the images from the PF21 Autumn Stamp Set on the bottom portion of a blank white card. I masked off the images with some stamping mask paper and then stamped the J16 Small Splatter over top. I removed the masks and added bits of yellow, orange, red, and brown color to the images with markers. I also added some small dots to the images with a fine-tip black pen---a fun little detail that I noted about the images on the cup. To finish, I stamped the E144 Thankful For You sentiment and rounded all four corners of my card base.
Here’s a look at the card and cup together:

I had so much fun creating this card and absolutely LOVE how we are surrounded by inspiration in our everyday lives! I hope you like what I’ve shared today. Thanks so much for visiting!
DeNami Design Supplies:
Stamps: PF21 Autumn Stamp Set, E144 Thankful For You, J16 Small Splatter
Ink: TK-VF082 Onyx Black Versafine (Tsukineko)
Cardstock: PC21 White Cards
Other Supplies:
Black Dye Ink, Markers, Pen, Corner Rounder, Stamping Mask Paper

Monday, August 31, 2015
Mini Thank You Cards
Hi Friends,
I love mini cards! Mostly because they are so cute and also, you can keep your note short and sweet. Carry a few with you so you can jot a note of appreciation to anyone that comes to mind. With it being a mini card, you can slip it someone just to let them know how much you appreciate them.
Val made the following mini cards using the chickie and a little monster. You can make a cute set of them and give them as gifts, too.
Here's how Valerie created them:
Hi Crafters! It's Valerie here today, and I have 2 cute, little Thank You cards to share with you!
I love mini cards! Mostly because they are so cute and also, you can keep your note short and sweet. Carry a few with you so you can jot a note of appreciation to anyone that comes to mind. With it being a mini card, you can slip it someone just to let them know how much you appreciate them.
Val made the following mini cards using the chickie and a little monster. You can make a cute set of them and give them as gifts, too.
Here's how Valerie created them:
Hi Crafters! It's Valerie here today, and I have 2 cute, little Thank You cards to share with you!

I'm using 5 DeNami Design stamp sets for these cards:

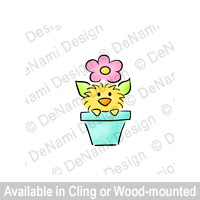


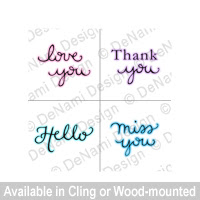
These cards are mini's, and they're 4" x 2.75".

I colored the images with Copic markers. After I colored the monsters, I painted them with my Clear Zig Wink of Stella for some glitter.

The patterned paper comes from the 6"x6" Unforgettable paper pad by My Mind's Eye.

Thank you very much for stopping by today, and Happy Crafting!

Tuesday, August 25, 2015
Funny Chickies Everyday Card
Hi Friends,
Valerie created a really cute card that will tickle you. The color and creativity makes this a unique card.
I love how you can dress up the chickies in all kinds of fun clothes and accessories. The accessories are not even limited to chickies, but you can dress up your favorite DeNami critter.
Here's how she did it:
Hello Crafters! I have 2 hilarious little Chickies from DeNami Design for you today!
I love how you can dress up the chickies in all kinds of fun clothes and accessories. The accessories are not even limited to chickies, but you can dress up your favorite DeNami critter.
Here's how she did it:
Hello Crafters! I have 2 hilarious little Chickies from DeNami Design for you today!
I created these two using the new Build-a-Chickie clear stamp set. It's such a fun set; you can build ALL KINDS of silly little craetures! The sentiment is the new Looking Forward to Seeing You stamp.


I added color to the card with Distress Ink pads;
I rubbed the ink pads on my craft sheet, spritzed them with water, and
dabbed my watercolor paper into the pool of colors. The dies I used to
cut the papers are Lawn Fawn's Large Stitched Rectangle dies, Lawn Fawn's Stiched Borders dies, and MFT's Pierced Circles dies.

The pretty ribbon comes from this Pretty Pink Posh Individual Twine Spools collection. The images are stamped with Memento Tuxedo Black Ink on X-Press IT Blending Card paper, and colored with Copic Sketch markers.

I hope you get this set; it's hilarious to play with!
Have a great day, and Happy Crafting!

Monday, May 4, 2015
Count Your Rainbows Card
Hi DeNami friends,
DT Lisa created a lovely card to brighten up someone you care about. Being on social media makes me all the more aware of people being sick, going through loss, facing life changes, etc. There are many people I know that can just use a friend to let them know they are not alone and to remind them of what they truly have. For me, it often takes hard times to, all the more, appreciate the good times. I would imagine you are like me, as well as your friends.
When I designed the stamp F241 "Count Your Rainbows, Not Your Storms", it really spoke to me about looking at the bright side, because there is always a bright side. It's all in perspective.
Recently, having been struck with diverticulitis (you can read about it here) and being in bed for 3 weeks, I had to face looking at the bright side myself. It made me grateful for what I did have. I was grateful for medication that could make me better eventually, I was grateful that it was a temporary condition, vs those that face cancer and might not know if they are going to get better. I was grateful for my family who helped me face it day by day. I was grateful for friends who came to cheer me up.... I could go on and on.
I am better now, but those lessons I learned will be engraved on my heart forever. I don't know what you are facing, but keep counting your rainbows. There are many, you just have to look intently at times.
I hope today you will find a rainbow in your day.
~Nami
Here's Lisa's heartwarming card. Enjoy!
Hello, crafty friends! Lisa P here with an uplifting Springtime card using a fun technique and one of my all-time favorite DeNami Design sentiments.
When I designed the stamp F241 "Count Your Rainbows, Not Your Storms", it really spoke to me about looking at the bright side, because there is always a bright side. It's all in perspective.
Recently, having been struck with diverticulitis (you can read about it here) and being in bed for 3 weeks, I had to face looking at the bright side myself. It made me grateful for what I did have. I was grateful for medication that could make me better eventually, I was grateful that it was a temporary condition, vs those that face cancer and might not know if they are going to get better. I was grateful for my family who helped me face it day by day. I was grateful for friends who came to cheer me up.... I could go on and on.
I am better now, but those lessons I learned will be engraved on my heart forever. I don't know what you are facing, but keep counting your rainbows. There are many, you just have to look intently at times.
I hope today you will find a rainbow in your day.
~Nami
Here's Lisa's heartwarming card. Enjoy!
Hello, crafty friends! Lisa P here with an uplifting Springtime card using a fun technique and one of my all-time favorite DeNami Design sentiments.
To start, I took a white cardstock panel and inked it up with four
different distress ink colors (in rainbow order).

I cut a vellum panel (same size as the cardstock panel), and embossed the
CL-F241 Count Your Rainbows sentiment onto the panel with white embossing
powder. I adhered the vellum over the top of the inked panel and just look at
how the vellum really softens those ink colors. So pretty. (Note: Even though I
used a vellum adhesive, I can still see the adhesive at the top of my focal
panel. If I were to recreate this card, I would only use the adhesive behind the
umbrella accent or use ribbon at the top to better hide the adhesive. Live and
learn, right??)

I couldn’t resist paper piecing the J135 Large Open Umbrella image with
some polka dot patterned paper, and I also embossed polka dots onto the larger
white panel beneath it as well. And the 4mm Sparkling Clear sequins from Pretty
Pink Posh make perfect raindrops.

I hope you like my card for today and feel inspired to try out this
technique!
Have a wonderful day!!!
DeNami Design Supplies:
Embossing Powder: EP06 White
Cardstock: PC21 White
Vellum: PC07 White
Other Supplies:
Ink: Picked Raspberry/Spiced Marmalade/Mustard Seed/Peacock Feathers
Distress Ink (Tim Holtz)
Cardstock: White (Papertrey Ink)
Patterned Paper: Bitty Dot Basics (Papertrey Ink)
Dies: Nesting Card Templates (Lifestyle Crafts)
Embossing Folder: Polka Dots (QuicKutz)
Sequins: 4mm Sparkling Clear (Pretty Pink Posh)
Embroidery Thread: Black (Janlynn)
Glitter Pen: Clear Wink of Stella (Zig)
Tool: Mini Ink Blending Tool (Ranger)
Adhesive: Vellum Adhesive (Tombow), Scor-Tape (Scor-Pal), Mono Multi Liquid
Glue (Tombow), Matte Multi-Medium (Claudine Hellmuth), Foam Tape (3M)

Saturday, April 4, 2015
Spring Flowers that Really Pop
Hi DeNami friends,
Easter and spring go together. New life, flowers and bright colors are a great change from the cold of winter. Here in Washington state, we have been enjoying some sunshine and it finally feels like winter is behind us.
Spring is my favorite season because of the newness of the weather change and anticipation of the outdoor adventures to come. Hello, DeNami Design friends! Lisa P. here to show you how popping up parts of your stamped images can be a fun and easy way to add a little pizzazz to your creations.
Easter and spring go together. New life, flowers and bright colors are a great change from the cold of winter. Here in Washington state, we have been enjoying some sunshine and it finally feels like winter is behind us.
Spring is my favorite season because of the newness of the weather change and anticipation of the outdoor adventures to come. Hello, DeNami Design friends! Lisa P. here to show you how popping up parts of your stamped images can be a fun and easy way to add a little pizzazz to your creations.
I have two Springtime cards to share with you today that demonstrate this
technique. The first is an A1-sized Easter card I created using CL-GD003 Spring
Flowers 1.

I stamped the images on my focal panel. Then, I stamped the flower portion
of the daffodil onto a separate piece of cardstock, colored it with markers, cut
it out, and adhered it over my focal panel image with a 3D foam square. I love
how this special little detail adds dimension and interest to an otherwise
simple card. Here’s a closer look:

For my second example, I used the same technique to create a colorful
birthday card.

I repeatedly stamped the Wavy Stem Trio and topped the stems with the
little daisy image from CL-GD003 Spring Flowers 1. I added a picket fence die
and grass border punch. Then, I stamped the flowers three times onto a separate
piece of cardstock, colored them with markers, cut them out, and adhered them
with foam squares on top of three of the flowers on my focal panel. Note: For
this example, I cut around the flowers instead of fussy cutting directly on the
stamped lines of each image. It’s much simpler, and it looks just as lovely (I
think). Here’s a closer look:

I hope you like my creations for today and feel inspired to try out this
simple technique!
Happy Stamping!
DeNami Design Supplies:
Stamps: CL-GD003 Spring Flowers 1
Embossing Folder: DA-1218-36 Diagonal Stripe
Twine: TW003 Spring Twine 3-pk
Other Supplies:
Copic Sketch Markers
Glitter Pen: Clear Wink Of Stella (Zig)
Cardstock: White (Papertrey Ink)
Patterned Paper: Let’s Polka 6x6 Inch Petite Paper Pack (Lawn Fawn)
Dies: Stitched Banner Duo Dies (Pretty Pink Posh), Picket Fence Die (Pretty
Pink Posh), Double-Ended Banner Dies (Papertrey Ink)
Punch: Grass Border (Fiskars)
Sequins: 4mm Sparkling Clear (Pretty Pink Posh)
Tool: Stamp-A-Ma-Jig (EK Success)
Other: Stamping Mask Paper (Inkadinkado)
Adhesives: Scor-Tape (Scor-Pal), 3D Foam Squares (Scrapbook Adhesives),
Matte Multi-Medium (Claudine Hellmuth)

Friday, February 13, 2015
Using a Sketch (How To)
Hi friends!
I am so excited to share what Deb has created. At DeNami, we have been working on creating creative blogposts and projects that are interesting to you as a reader and stamper. Deb hit the nail on the head with this post!
If you have been following blogs, you have likely seen "Sketches" or "Challenges" to enter or follow. Deb is going to show you how to create cards based on Sketches.
Her Sketch is this:

I am so excited to share what Deb has created. At DeNami, we have been working on creating creative blogposts and projects that are interesting to you as a reader and stamper. Deb hit the nail on the head with this post!
If you have been following blogs, you have likely seen "Sketches" or "Challenges" to enter or follow. Deb is going to show you how to create cards based on Sketches.
Her Sketch is this:
When you see this, there are a variety of ways to base your card on this sketch. Here is how Deb does it. She writes:
Hello
friends! It’s Deb here today. Have you ever created a card and realized that
you could use the sketch over and over again? Well, I have created a few cards
in the past using a certain sketch and thought I would create a few more using it
again.
Here are the
cards from the past.


The sketch uses
an A2 card rectangle and a circle in the top portion as a focal point. You can
create a patterned background like I did for the Beautiful Blossoms blog hop or
keep it plain. I think this
sketch works great for small images that you want as the focal point or to
emphasize a sentiment.
For my first
card, I inked up E182 Little Wagon, B118 Little Hearts and the sentiment is
from CR02Monster Love Clear stamp set. I added a bow using some twine from my
Classic Twine pack.

My second
card uses one of the gorgeous sentiments and accent from CR04 Heartfelt Blessings clear stamp set and some twine from my Pastel twine pack.


Thursday, December 18, 2014
Elegant Merry Christmas
Hi Friends,
I love doing various color themes for the holidays. I ventured out and
did something that really looked different, yet elegant. I use a dark
charcoal gray with black to make this into a cheerful greeting.
I used basic supplies to create my own patterned paper to coordinate it all.

Supplies:
Charcoal Gray Cardstock
PF02 Classic Christmas, Holly from Petit Fours set
ATG Adhesive using ATG applicator
Directions:
1) I folded over a 5.5x8.5 Black cardstock in half making it an A2 size card.
2) I then cut a smaller grey panel so that the black card frames the edge of the cardstock.
3) I stamped the Solid Decorative Crest stamp in a pattern then attached to the black card using ATG adhesive.
2) I then cut a smaller grey panel so that the black card frames the edge of the cardstock.
3) I stamped the Solid Decorative Crest stamp in a pattern then attached to the black card using ATG adhesive.
4) I cut a rectangular black cardstock and also another grey panel within that black layer.
5) I used the Three Line Border to create a plaid pattern then attached to the black layer using ATG adhesive.
6) I cut a long grey rectangle and then a black panel so the grey frames it.
7) I stamped the Decorative Flourish stamp with Platinum Planet
8) I stamped the Holly in Olympia green and fussy cut it.
9) I cut a black panel with a smaller white panel for the sentiment and stamped the Merry Christmas in black
10) I attached the holly with ATG adhesive and added the rhinestones. I then attached that sentiment panel to the card. You can use foam tape or ATG adhesive.


Step #5- Start with stamping one of the stripes and then line up the wood block to the stripe you stamped. Repeat this all the way across for even stripes.

Step #5- Once the stripes going in one direction is filled, go the other direction, lining up the wood block to the stripes to create a plaid. For a fun variation, you can do different colored inks on one direction vs the other. In this case, you can do Smoky Gray then Black the other direction. Or if you do this card on white, you can do green in one direction and red the other direction.


Step #8- The Holly stamped in Olympia green and then fussy cut.

You can do variation of this card. Change out the sentiment to "Happy Birthday" and use leaves to create an elegant card that you can use for a man, too.
Enjoy making this elegant creation.
See you next time!
Nami
Wednesday, December 3, 2014
Friendly Seal Tag Card
Hi Friends,
Do you love cute little animals like I do? This season we are featuring a seal for the first time. It is called D174 Friendly Seal. You can dress him up with a santa hat, birthday had or bow to dress him up for all occasions.
Lisa E did a fabulous job adding lots of texture and layers to make this a dimensional and lovely card.
You can easily make this in various colors to match your style. You can cut out a little iceburg and perch him on it along with several friends.
Lisa shares how she created this adorable card.
She writes:
I'm sharing one today that features another of the new DeNami Christmas stamps.

I think this little Friendly Seal is my favorite from the new release, it's so darn cute!! I stamped and colored the little fella then trimmed him out and covered him with Glossy Accents. While he dried I created the rest of the card.


Do you love cute little animals like I do? This season we are featuring a seal for the first time. It is called D174 Friendly Seal. You can dress him up with a santa hat, birthday had or bow to dress him up for all occasions.
Lisa E did a fabulous job adding lots of texture and layers to make this a dimensional and lovely card.
You can easily make this in various colors to match your style. You can cut out a little iceburg and perch him on it along with several friends.
Lisa shares how she created this adorable card.
She writes:
I'm sharing one today that features another of the new DeNami Christmas stamps.
I think this little Friendly Seal is my favorite from the new release, it's so darn cute!! I stamped and colored the little fella then trimmed him out and covered him with Glossy Accents. While he dried I created the rest of the card.
I die cut three PPP tags. I stamped the small white tag with an Ornamental Centerpiece image then added a layered die cut wave border to tuck the seal into. I used the {Noel} sentiment from the Christmas Greetings Set, along with some pretty decorative paper and Antique Rose Rhinestones.
Monday, December 1, 2014
Peace Hope Joy Card and Gift Set
Hi Friends,
Now that Thanksgiving is over, there is the mad dash to start projects your have been planning to do for Christmas. Now is a great time to make some lovely gifts that you can give to co-workers, teachers, neighbors, friends and family.
Look how elegant this project is. You can easily make even more dimensional with 3D Lacquer and Sparkletts glitter. You can also add Rhinestones to bling it up.
Lisa P shared how she made these lovely projects. Enjoy!
Now that Thanksgiving is over, there is the mad dash to start projects your have been planning to do for Christmas. Now is a great time to make some lovely gifts that you can give to co-workers, teachers, neighbors, friends and family.
Look how elegant this project is. You can easily make even more dimensional with 3D Lacquer and Sparkletts glitter. You can also add Rhinestones to bling it up.
Lisa P shared how she made these lovely projects. Enjoy!


Lisa writes:
This festive gift set features the brand new I70 Peace Hope Joy sentiment from DeNami Design. I love this stamp because it can be used on cute and whimsical projects as well as elegant creations. And just look at how gorgeous it is embossed in gold!!! Stunning, really!
I started by making a tag for a gift bag. I used a circle die and traced a
pencil outline lightly onto a piece of white cardstock, making sure the circle
was big enough for my sentiment to fit inside of it. I stamped the pinecones and
pine branches from CL-CH003 Winter Pine to form a wreath. I allowed the ink to
dry completely and then stamped and embossed the I70 Peace Hope Joy sentiment in
the center of the wreath. I added some embossed berries from the CL-CH004 Elegant Holly Stamp Set to fill in any open spaces. I trimmed the panel down to
form a square tag and rounded the corners. I cut a slightly larger square panel
from kraft cardstock, rounded the corners and adhered it to the white stamped
panel. I cut two tiny holes in the top of the tag, threaded some hemp cord
through the holes and tied the tag onto a cellophane gift bag.
After finishing the bag, I thought it would be fun to make a coordinating
gift box. I used the GF05 Square Gift Box Template from DeNami Design. I love
these templates! They are so simple to use! I cut out the box following all of
the solid lines on the template. I flipped the template over so that the
remaining dotted lines were on the back side and repeatedly stamped the
pinecones and pine branches from CL-CH003 Winter Pine Stamp Set to cover the
box. I flipped the template over again, so I could see the dotted lines and used
a ruler and bone folder to score along each of the dotted lines. I folded along
the scored lines and assembled the box. To finish, I tied on some hemp
cord.
For my gifts, I placed holiday scented lotion in the gift bag and lip balm
in the gift box, but these packages are the perfect size to hold any number of
fun gifts for co-workers, teachers, friends or family members.
I hope you like my project for today! Thanks for stopping by!
Supplies (for Gift Tag):
Stamps: CL-I70 Peace Hope Joy, CL-CH003 Winter Pine, berries from CL-CH004 Elegant Holly (DeNami Design)
Ink: Rich Cocoa and Pistachio Memento (Tsukineko), TK-VM001 VersaMark (Tsukineko)
Embossing Powder: Queen’s Gold (Ranger)
Cardstock: White and Kraft (Papertrey Ink)
Tools: Stamp-A-Ma-Jig (EK Success), Crop-A-Dile Corner Chomper (We R Memory
Keepers), Hole Punch
Hemp Cord: Natural (Hemptique)
Treat Bag: (World Market)
Crinkle Shreds: recycled from packaging
Festive Hand Soap: (Bath and Body Works)
Adhesive: Scor-Tape (Scor-Pal)
Supplies (for Gift Box):
Ink: Rich Cocoa and Pistachio Memento (Tsukineko)
Gifts and Favors Template: GF05 Square Gift Box (DeNami Design)
Hemp Cord: Natural (Hemptique)
Adhesive: Scor-Tape (Scor-Pal)

Subscribe to:
Posts (Atom)

Follow Us

 |
 |
 |
 |
 |


