
Showing posts with label thank you card. Show all posts
Showing posts with label thank you card. Show all posts
Monday, May 16, 2016
Cute Pony Thank You Card
Hi, DeNami Design Friends!
It’s Lisa P. On May 7th
my husband and I attended our first Derby Party. It was so much fun!! I
wanted to create/send a handmade thank you note to the party hosts and
found the perfect images in my DeNami Design stash! Here’s what I came
up with:

I
stamped the CL-GD006 Leafy Square onto white cardstock, colored it in
with markers, and then die-cut it out with a double-pierced square die. I
stamped the horse from the PF25 Farm Animals Stamp Set as shown and
colored him in. I die-cut a banner from white cardstock, stamped the
sentiment, two roses and leaves, and added color with markers. I
attached the banner just below the horse and then adhered this focal
point to the front of my card base with foam tape. To finish up, I added
a touch of sparkle to all of the images with a clear glitter pen.
Here’s a closer look:

I hope you like my card for today! If you’d like to see a couple of photos from the party, hop on over to my blog.
Thanks for visiting!!
DeNami Design Supplies:
Stamps: PF25 Farm Animals Stamp Set, PF29 Everyday Greetings Stamp Set, CL-GD006 Leafy Squares, PF27 Whimsical Flowers Stamp Set
Other Supplies:
Dye Ink, Copic Markers, Glitter Pen, Red and White Cardstock, Patterned Paper, Dies, Adhesive, Stamp-A-Ma-Jig


Wednesday, January 27, 2016
Floral Filigree Thank You Card
Hello DeNami Friends!
Today, I've got a floral thank you card featuring the E204 Flower Filigree stamp and K24 Thank You Script stamp. I hope you like my pink, floral, feminine card! I didn't really realize how much I love pink until I started card making, LOL!
On a piece of white cardstock, I repeatedly stamped the flower filigree stamp with versamark ink, creating a floral background. I heat set the flowers with white embossing powder and my heat tool. Then, I did some ink blending using pink and various red toned inks. The white embossed flowers will resist the ink making the flowers pop against the ink blended background. I die cut a scalloped rectangle out of another piece of white cardstock, then die cut a circle within the rectangle, and stamped the Thank You sentiment. I added some foam tape to the back of the white cardstock and attached it to my ink blended floral background. Then, I adhered it to a pink card base. To finish off my card, I added some glitter glue to the center of the floral images, and added some clear sequins.
Quick tip: When you are using white cardstock, make sure your fingers are not inky! After all the ink blending, you may end up with some inky fingers. Take the time to wipe or wash you hands, so you avoid ink smudges! That's something I have to constantly remind myself, LOL! I love the look of white negative space on my cards, and I have often had to re-make a card panel because of ink smudges!


Today, I've got a floral thank you card featuring the E204 Flower Filigree stamp and K24 Thank You Script stamp. I hope you like my pink, floral, feminine card! I didn't really realize how much I love pink until I started card making, LOL!
On a piece of white cardstock, I repeatedly stamped the flower filigree stamp with versamark ink, creating a floral background. I heat set the flowers with white embossing powder and my heat tool. Then, I did some ink blending using pink and various red toned inks. The white embossed flowers will resist the ink making the flowers pop against the ink blended background. I die cut a scalloped rectangle out of another piece of white cardstock, then die cut a circle within the rectangle, and stamped the Thank You sentiment. I added some foam tape to the back of the white cardstock and attached it to my ink blended floral background. Then, I adhered it to a pink card base. To finish off my card, I added some glitter glue to the center of the floral images, and added some clear sequins.
Quick tip: When you are using white cardstock, make sure your fingers are not inky! After all the ink blending, you may end up with some inky fingers. Take the time to wipe or wash you hands, so you avoid ink smudges! That's something I have to constantly remind myself, LOL! I love the look of white negative space on my cards, and I have often had to re-make a card panel because of ink smudges!


DeNami Supplies:
Tuesday, December 29, 2015
Thank You Coffee Card
Hi Friends!
Hope you all had a fantastic Christmas and are enjoying holiday season. I love Christmas so it will be hard to move on, but we have some wonderful things ahead for the new year.
Today, DT Val created a cheery coffee card that you can use for all your "thank you" needs or even to write a "thank you" for the Christmas gifts you got. Her choice of design and color makes this a great all around card.
It would be simple enough to change out the sentiment and make this into a Thinking of You card or Birthday Card. Just choose your saying.
Here is how Val created this lovely card...
~~~~~~~~~~~~
Hello and Happy Almost-New-Year! Seriously? 2015 is almost over? Wow, it's been a good year for me, and the perfect way to finish the year is to announce that I am now officially employed! I am now working in a children's dentist office (the one all 4 of my kids have been going to for 16 years!) training to be the Office Coordinator; I am super duper excited!
Hope you all had a fantastic Christmas and are enjoying holiday season. I love Christmas so it will be hard to move on, but we have some wonderful things ahead for the new year.
Today, DT Val created a cheery coffee card that you can use for all your "thank you" needs or even to write a "thank you" for the Christmas gifts you got. Her choice of design and color makes this a great all around card.
It would be simple enough to change out the sentiment and make this into a Thinking of You card or Birthday Card. Just choose your saying.
Here is how Val created this lovely card...
~~~~~~~~~~~~
Hello and Happy Almost-New-Year! Seriously? 2015 is almost over? Wow, it's been a good year for me, and the perfect way to finish the year is to announce that I am now officially employed! I am now working in a children's dentist office (the one all 4 of my kids have been going to for 16 years!) training to be the Office Coordinator; I am super duper excited!
HOWEVER, with that wonderful news comes some sad news... I will be leaving DeNami Design.
I have worked for DeNami for 6 months now, and it's been a wonderful 6
months and a great team to work with! I will definitely miss the
adorable images Nami designs! Hopefully I will find the time to work
with them occassionally, though!
OK, so now on to the card I designed for today! I made a Thank You Coffee Card!
I started by stamping the Whimsical Wreath stamp all over my blending card paper with Memento Tuxedo Black Ink. Then I stamped the coffee cups from the Cafe Clear Stamp Set in
each of the wreaths. I colored all the images with Copic Sketch
Markers. After coloring the cups, I stamped the smiley face and the
hearts onto the cups with VersaFine Onyx Black Pigment Ink.

I took out some vellum, trimmed it down, and stamped the dotted lines from the Basic Borders set, and the Thanks a Latte sentiment, with Memento Rich Cocoa ink. Then I quickly poured a brown embossing powder over the stamped images and heat embossed them.

I
adhered the vellum to the paper with
adhesive. The final touches
were painting the coffee mugs with a shimmery paint marker and adheringit to a piece of decorative cardstock.

Hope you enjoyed and got some inspiration! Have a wonderful day, and Happy New Year, and HAPPY CRAFTING!

Monday, November 9, 2015
Thankful for You Gift Card Holders
HI Friends,
What do you give to someone you don't know what to get for? Gift cards! Basically, there is a gift card for just about anyone and anything you can think of!
If they drink coffee, there is Starbucks or their favorite coffee house. If they like to build things, there is Home Depot or Lowes. If they like crafting, there is Michael's, Hobby Lobby or JoAnn's. If you really don't know, there is always Amazon, which is my personal favorite, in case you were wondering;)
Finding a creative way to give that gift card can be challenging, BUT DT Lisa made it so easy. You can easily change the theme on the front, but use the pocket she designed for the inside. Take a look and see how simple, but pretty these cards are. You can whip them out in one afternoon for all those you need to give a gift to. With Thanksgiving coming up, now is the perfect time to show your appreciation to those who have done things for you, those who have served faithfully, or those you just appreciate.
Comment if you have people you plan to give thanksgiving or thank you cards for this coming Thanksgiving.
~~~
Hello there! It’s Lisa P. Today I’m sharing a couple of gift card holders I made using a new (to me) technique. Let me start by showing you the finished product.
What do you give to someone you don't know what to get for? Gift cards! Basically, there is a gift card for just about anyone and anything you can think of!
If they drink coffee, there is Starbucks or their favorite coffee house. If they like to build things, there is Home Depot or Lowes. If they like crafting, there is Michael's, Hobby Lobby or JoAnn's. If you really don't know, there is always Amazon, which is my personal favorite, in case you were wondering;)
Finding a creative way to give that gift card can be challenging, BUT DT Lisa made it so easy. You can easily change the theme on the front, but use the pocket she designed for the inside. Take a look and see how simple, but pretty these cards are. You can whip them out in one afternoon for all those you need to give a gift to. With Thanksgiving coming up, now is the perfect time to show your appreciation to those who have done things for you, those who have served faithfully, or those you just appreciate.
Comment if you have people you plan to give thanksgiving or thank you cards for this coming Thanksgiving.
~~~
Hello there! It’s Lisa P. Today I’m sharing a couple of gift card holders I made using a new (to me) technique. Let me start by showing you the finished product.

I created two blank A1-size cards (measuring 3 ½” x 4 7/8”). I stamped one leaf from DeNami Design’s CL-GD010 Solid Leaves onto each card in autumn colored inks. Then, using a fine tip black pen I drew in (very loosely and artsy) the outline of the leaves. Isn’t that a super fun little detail?!?! This was my first time trying that, and I’m really thrilled with the results! YAY!
I stamped the E144 Thankful For You sentiment below each leaf. LOVE the beautiful font of that sentiment stamp!
Inside each card, I created a pocket using the PPPD02 Pretty Pink Posh Pocket Border Die. To make the pocket, I cut a strip of white cardstock to 3 ½” x 2 ¼” and then die-cut the pocket edge at the top (centering the die on my strip of cardstock). I then adhered the strip to the inside of the card using adhesive only around the edges in order to form a pocket. It’s perfect for holding a gift card. Here’s a look:

To finish off my gift card holders I tied them closed with some jute twine. Here’s a look at each one:


What do you think?!?!
I hope you like my project for today, and I hope you’ll give this technique a try with some of your solid stamps!
Thanks for visiting!
DeNami Design Supplies:
Other Supplies:
Dye Ink, White Cardstock, Black Fine Tip Marker, Jute Cord, Adhesive Tape, Stamp-A-Ma-Jig

Monday, August 31, 2015
Mini Thank You Cards
Hi Friends,
I love mini cards! Mostly because they are so cute and also, you can keep your note short and sweet. Carry a few with you so you can jot a note of appreciation to anyone that comes to mind. With it being a mini card, you can slip it someone just to let them know how much you appreciate them.
Val made the following mini cards using the chickie and a little monster. You can make a cute set of them and give them as gifts, too.
Here's how Valerie created them:
Hi Crafters! It's Valerie here today, and I have 2 cute, little Thank You cards to share with you!
I love mini cards! Mostly because they are so cute and also, you can keep your note short and sweet. Carry a few with you so you can jot a note of appreciation to anyone that comes to mind. With it being a mini card, you can slip it someone just to let them know how much you appreciate them.
Val made the following mini cards using the chickie and a little monster. You can make a cute set of them and give them as gifts, too.
Here's how Valerie created them:
Hi Crafters! It's Valerie here today, and I have 2 cute, little Thank You cards to share with you!

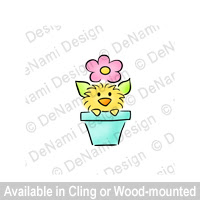
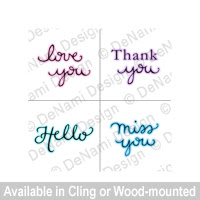
I'm using 5 DeNami Design stamp sets for these cards:



These cards are mini's, and they're 4" x 2.75".

I colored the images with Copic markers. After I colored the monsters, I painted them with my Clear Zig Wink of Stella for some glitter.

The patterned paper comes from the 6"x6" Unforgettable paper pad by My Mind's Eye.

Thank you very much for stopping by today, and Happy Crafting!

Wednesday, April 15, 2015
Make it Sparkle! Adding Sparkle to your Card
Hi DeNami friends,
DT Lisa P created a lovely and sparkly card in two ways. It is great to have different ways of adding embellishments, depending on your tastes and time constraints. I love them both. Which do you like better?
Read how Lisa does it below:
Hello, DeNami Design friends! It’s Lisa P. Today I’m sharing a couple of examples of how you can dress up your projects with rhinestones and/or glitter. It’s so simple to do and really adds a touch of pizzazz to your cards.
DT Lisa P created a lovely and sparkly card in two ways. It is great to have different ways of adding embellishments, depending on your tastes and time constraints. I love them both. Which do you like better?
Read how Lisa does it below:
Hello, DeNami Design friends! It’s Lisa P. Today I’m sharing a couple of examples of how you can dress up your projects with rhinestones and/or glitter. It’s so simple to do and really adds a touch of pizzazz to your cards.
Here’s my first card:

I started by stamping and heat embossing the gorgeous K24 Thank You Script
in gold on a white cardstock panel. I then repeatedly stamped the E116 Medium
Solid Filigree image across the bottom. (Note: I started in the center and
worked my way out to the edges. I also used a Stamp-A-Ma-Jig tool, which is very
helpful when trying to line up wood-mounted images.) I added rhinestones to each
of the filigree images and edged the bottom of the panel with gold embossing
powder.
Here’s a closer look:

My second card uses the same layout and images, but this time around I used
glitter for my touches of sparkle.

I used a glue pad to stamp the E116 Medium Solid Filigree images and
sprinkled them with SS17 Magenta Sparklets Glitter. You should see how
incredibly shimmery this is in real life! WOW!
Here’s a closer look:

I hope you like my projects for today and feel inspired to add a bit of
bling to your future creations. Have a fantastic day! Thanks for stopping
by!
DeNami Design Supplies:
Cardstock: PC21 White and PC35 Magenta
Rhinestones: RN11 Hot Pink (Kaiser Craft)
Glitter: SS17 Magenta Sparklets Glitter
Other Supplies:
Ink: Bubble Gum (Hero Arts)
Embossing Powder: Queen’s Gold (Ranger)
Other: VersaMarker (Tsukineko)
Tool: Stamp-A-Ma-Jig (EK Success)
Adhesives: Scor-Tape (Scor-Pal), 3D Foam Squares (Scrapbook
Adhesives)

Subscribe to:
Posts (Atom)

Follow Us

 |
 |
 |
 |
 |


