
Showing posts with label Spring Cards. Show all posts
Showing posts with label Spring Cards. Show all posts
Wednesday, April 26, 2017
Spring Card Exchange

Who doesn't like to get real mail? I'm not talking junk mail, bills or ads, but real mail with real love put in it?
DeNami would like to do a fun thing for our fans by putting together a Spring Card Exchange.
This is how it would work:
- Make 5 identical cards or you can do 5 different cards. All must be handmade or handcrafted.
- Send each card to the participants on your list.
- Take pictures of the cards you receive and post on your social media and tag DeNami and #DDSCE17
- That's it!
- You will get 5 cards in return. As a bonus, if you send an extra one to DeNami, we will share it on our FB page and you will get a coupon code to use on the DeNami site!
Entries will be limited to the first 25 people that let me know. You can let me know via email, Facebook, or Instagram msg.
Email: denamidesign@gmail.com
Facebook: facebook.com/denamidesign
Instagram: instagram.com/denamidesign
Who wants to join?
Participants must join by May 15 and all cards must be mailed out by Friday, June 2.
When contacting DeNami to participate, please include your full name, email address and address to send cards to.
Note: Please only enter if you can fulfill your part. We all have great intentions, but we also need to be realistic. BUT, maybe this is exactly the kind of fun you need in your life! You can start making your cards now so you can be ready.


Friday, March 24, 2017
Spring Coffee Lover's Blog Hop

Welcome to the Spring Coffee Lover's BlogHop!
We are delighted to be one of the sponsors for this season's hop. We put together our spring project to join in on the fun. Hope you like it!
Be sure to leave a comment to be entered to win a $20 certificate from DeNami.
This season Starbuck's created three blank cups for people to decorate. I decided to add my own twist to the sleeve to decorate this robin's egg blue cup. I love how it turned out!
I used a paper straw to finish out the look.

Here's a more simple picture of the cup.

I started by taking the sleeve and creating a template. I took our stitched circle D123 to create each scallop along the edge and then cut it out. What you see is the plain sleeve template I had and then stamped the circles on the edge on a large white cardstock.
I stamp no more than half the circle past the edge. For shallower scallops, just stamp a third of the circle, making sure the scallops touch side to side.

Here's what the sleeve looks like when it is decorated.
I used the daisy stamps J77 Large Daisy Blossom and D75 Small Daisy Blossom and for the overall background and the A93 Teeny Swiss Dot for the accent dots using the Versafine Smoky Grey. I also used Versa Magic Sea Breeze for the J120 Demi Dot Circle Frame.
Here's a close up of the center of the sleeve. I hand dotted the scallops using a Tombow Marker in a dark grey.

I stamped one of the butterflies from the CL-GD001 Fancy Flutters Set in Versafine Smoky Grey and colored it in with Tombow Markers.

I love the pretty spring colors.


Receive 10% off your next order using code CLH2017 for 10% off your order.
Don't forget to follow this blog! Follow HERE.
Don't forget to follow this blog! Follow HERE.
Be sure to sign up for our email specials HERE.
Follow us on Facebook HERE.
Follow us on Instagram HERE.
Follow us on Pinterest HERE.
Follow us on Twitter HERE.
You will find all your hop stops here.
Thanks for visiting!
Wednesday, April 20, 2016
Guest Designer- Amy Tsuruta "Hoppy Spring" Striped Card
Hi Friends,
We welcome Amy Tsuruta back for more stamping fun. She created a unique spring card today. From the initial impression, it appears the background is on a striped cardstock, but what she actually did was use half inch (.5 inch) strips of alternating cardstock and mounted it to the base layer card creating her own unique background. It makes it more special, but at the same time it is a simple way of creating that special card.
This is a great way to use your scraps of paper that you may have. If you are a papercrafter then you have always hoped to use your scraps, so this is the perfect solution!
What ways do you use your scraps? I'd love to hear.
Thanks for joining us today!

DeNami Supplies:F159 "Hoppy" Spring

Thursday, April 7, 2016
Week of Spring- Day 3
Hello DeNami friends,
Today I want to share this unconventional spring card with you. I was not sure if I really wanted to include such a large black area in a spring card but decided that it created a nice contrast to the distressed stencil background and the cute owls.

I started off taping a circle/bubble stencil to my white paper and applied two green inks over it. I then cut the panel into place and die cut a black background panel. I also stamped the Owl Love Birds on white cardstock and colored them with watercolor markers. Instead of fuzzy cutting the owls I decided to cut a white strip.

To assemble the card I adhered everything together and also placed a few mint green sequins on the card.
DeNami Supplies:

Tuesday, April 5, 2016
Week of Spring- Day 2
Hello DeNami Friends!
Spring is finally here! Yeah! April showers are here and the flowers are starting to bloom, well if you don’t have deer like I do! Haha! For this week's project the theme is spring and I have been wanting to do a shaker card for a while now and I thought, "why not now?!" Not only is this card a shaker card but I also did watercolor for the card.
1) To make my card I created my watercolor panel first.
2) Next, I die cut it with a die that creates a frame and the main panel.
3) I stamped "happy birthday" in black and heat embossed it with clear embossing powder.
4) For the flowers and bugs, I used the Flower Patch and Bitty Bugs stamp sets.
5) I used a grey die ink so that it would be soft on the background.
6) Next, attach the acetate to the frame and then the foam adhesive.
7) After that, I attached the back panel to the card base and then placed my shaker bits on the back panel.
8) Last, I placed I attached the shaker window to the card base making sure that everything was lined up perfectly.
I hope that you like my project! Until next time!

DeNami Supplies:

Monday, April 4, 2016
Week of Spring- Day 1
Hello, DeNami Design Friends!
It’s Lisa P. This week our design team projects are all about Spring.
I’ve seen several dies and stamp sets on the market for creating floral wraps for bouquets of flowers. In fact, I have one of these combos on my wish list, but for now I decided to take a shot at making my own using supplies I already have. Here’s how it turned out:

What do you think???
Here’s what I did. I cut a piece of patterned paper to 4” x 4” and then die-cut two adjacent sides with a stitched scallop border. I scored from the fourth scallop, down to the point on each side as shown.

To finish I used a bone folder to fold the flaps over, snipped the pointy end to make it less pointy, and tied on some twine. Ta-da! Now I have a floral wrap to fill with whatever bouquet of flowers I want.

For this project I chose to create a bouquet of daisies. The J77 Large Daisy Blossom is super simple to fussy cut. I stamped and cut out three, grouped them together in my floral wrap and added some enamel dots to the center of each. I also created a little sentiment tag for the bouquet using the NEW CL-D187 Celebrating You stamp. Here’s a closer look:

I added my wrapped bouquet of daisies to a card front, but you could easily add it to a tag or gift box as well.
I’m planning to give this card to my sweet neighbor friend for her birthday this week. I hope she likes it!!!
Thanks for visiting!
DeNami Design Supplies:
Cardstock: PC21 White
Other Supplies:
Dye Ink, Copic Marker, Patterned Paper, White Cardstock, Tag Die, Twine, Embellishments, Stamp-A-Ma-Jig, Adhesive

Friday, March 18, 2016
DeNami's Spring Fling Blog/Instagram Hop

Welcome to the DeNami Blog/Instagram Hop (#BIGDDHop) hosted by DeNami!
We will be giving away a $50 gift certificate on the Instagram Hop and a bonus $20 on the blog hop! Be sure to join both for more chances to win!
To enter the blog $20 giveaway, you must GO to each blog and COMMENT on each of them. You will be given the next stop. It should make a loop and you will end up back here.
To enter the blog $20 giveaway, you must GO to each blog and COMMENT on each of them. You will be given the next stop. It should make a loop and you will end up back here.
5) Kay Miller
6) Jung AhSang
8) Julia Klein
9) Elizabeth Gunn
10) Stephanie Klauck
11) Sharna Waksmulki
12) Valerie Ward
13) Amy Tsuruta
Your next stop is Jeanin's blog HERE.
10) Stephanie Klauck
11) Sharna Waksmulki
12) Valerie Ward
13) Amy Tsuruta
Your next stop is Jeanin's blog HERE.
For more added fun, join the hop on Instagram and enter to
win a $50 gift certificate from DeNami. The hop begins today and will go on until Friday, March 25th. A winner will be announced on Friday, April 1st. The Instagram profiles are listed below. Start at DeNami page and click the picture to know where your next stop will be. The list is below in case you get lost.

To enter, go to Instagram and find the hop graphic and:
1) Like each post
2) Follow each person on it
3) Comment on each stop
For bonus entries:
4) Repost with #BigDDHop and @denamidesign
5) Tag friends (one per line)

To enter, go to Instagram and find the hop graphic and:
1) Like each post
2) Follow each person on it
3) Comment on each stop
For bonus entries:
4) Repost with #BigDDHop and @denamidesign
5) Tag friends (one per line)
Here are all the Instagram participants (only link the previous
blog, and the one next):
DeNami Design Instagram- IG @denamidesign
DeNami Design Instagram- IG @denamidesign
Jeanin Jugler IG @some_bits_and_pieces
Daniela Dobson IG @danieladobson
Candi Billman IG @filoeyecandi
Kay Miller IG @kaym2015
Daniela Dobson IG @danieladobson
Candi Billman IG @filoeyecandi
Kay Miller IG @kaym2015
Thursday, March 17, 2016
Spring Theme Thank You Card
Hello DeNami Friends!
Spring is coming! I can’t wait for the flowers to start
blooming but since I have to wait I decided that I would create my own little
piece of spring with a watercolor flower box window card. This was my first
time working with watercolors and masking at the same time so there was a steep
learning curve! If you saw my sneak peek on Instagram with a lot of fussy cut
flowers (pic below), this is the card that I created with all those little flowers!
To create this card I stamped the flowers on masking paper
and fussy cut them out. I placed all of the flowers on some watercolor paper
where I wanted them and then stamped the window with black waterproof ink.
Next, I carefully removed and stamped all of the flowers in the same ink. I was
careful to start with the top layer of masks and work my way down. After that, I
watercolored each of the flowers making sure to not to color flowers that were
next to each other so that the colors wouldn’t bleed together. I did this with
each of the images until everything was colored in. Also, I let each image dry
before completely before I would color an image that was next to it. This is
what took a while. I could have used a heat tool to dry everything but I chose
to let everything air dry. After the coloring was complete, I used a stitched
rectangle die to trim down the piece and adhered it to my card front. On the
inside of the card I stamped the Thanks a Bunch sentiment in black ink. I hope
that you enjoyed my project! Until next time!


Here is my fussy cutting process pic.

DeNami Supplies:

Friday, March 11, 2016
Guest Blogger- Stephanie Klauck with Flower Filigree Card
Hello, it's Stephanie and I'm back today with another card I created with the new DeNami Design stamps.
To create my card, I started with a plain white cardstock panel and stamped the Flower Filigree Trio and the Little Leaf Filigree repeatedly with black ink to create a design along the left edge and bottom of the panel. I also added in some hearts from the Forever Friends stamp set to fill in some of the open space on the design.

Once I had all of the stamping done, I used my Copic markers to color in all of the flowers, leaves and hearts with bold, rich colors. Once I had them all colored, I added in some additional detail with a white gel pen (on the flowers) and a black pen (to add more dots in between the stamped flowers and leaves). I completed the card by stamping the sentiment directly on the stamped panel and then I trimmed it down and adhered it to black top-folding card base.


Wednesday, March 9, 2016
Somebunny Loves You Theme Week- Day 3
Hello DeNami Friends!
Today, I've
got a card that is perfect for a good friend! I really love the
sentiments in DeNami's Heartfelt Blessings stamp set, and I love how my
card came together.
Here's how I created my card:
- I stamped the Bunny Trail Trio stamp on a piece of white cardstock. I also drew a circle using a pencil and circle die to create my sun.
- I stamped the bunny tail trio again onto a piece of post it sticky note, then cut it out to create a mask.
- Using
more post it notes, I hand cut a hill mask keeping both sides of the
post it note to mask both the hills and sunset sky. I also die cut a
circle (the same circle I used to draw my sun) out
of another post it note to create a mask for the sun.
- First,
to create my hill, I used the top portion of my hill mask, to mask off
the bunnies, sun, and sky. I also placed the bunny mask over the
stamped bunnies. Then, I blended some green ink,
creating a hill.
- I
removed the top portion of the mask. Then, I placed the circle mask
above the image, covering up the circle that I drew. I also took the
hill mask, and covered my hill with it. Then, I blended
2 orange inks creating a sunset sky. I removed all the masks,
revealing a white sun and white bunnies.
- I colored in the bunnies and the sun with markers. I also added some clear glitter marker over the sun image, making it sparkle.
- I stamped the sentiment on my hill with Versamark ink, and heat set with gold embossing powder.
- Next, I die cut a rectangle out of a piece of floral patterned paper.
- Then, I die cut a smaller rectangle out of my colored piece. I attached this to the patterned paper using thin foam squares.
- I wrapped some twine around both rectangles, tying it into a bow. Then attached the whole thing to a white card base using foam tape.
- To finish off my card, I added some sequins.


DeNami Supplies:

Tuesday, March 1, 2016
Week of Easter- Day 2
Hello DeNami Friends!
Spring is coming soon! I can’t personally can’t wait for the warm weather and the flowers to start blooming. Spring also means that Easter will be here soon which is this weeks DeNami Design Team theme. I thought to myself that I wanted to do something different for my Easter project this week. So I made and Easter Basket card!
I used a die that creates a small basket that when you cut 2 out you can adhere them together to make a card that is basket shaped and you can insert a little tag or card into. I used flower pattern paper to cut out my 2 pieces of the basket. For my insert I used 2 nested dies and stamped the adorable Bunny and Easter Eggs on white cardstock. To stamp the greeting I used the Small Happy Easter stamp and inked “Happy” first and stamped it and did the same thing for “Easter” and stamped it below “Happy”.
I hope that you enjoyed my project this week! Until next time!


Monday, February 8, 2016
Same Cards Three Ways Day 1
Hello, DeNami Friends!
It’s Lisa P. This week our design team is featuring
either three cards with the same stamps OR the same card in three
colors. I chose the second option.
I really enjoy making multiples of
cards---especially when I create a design that I really love. I find
that making the first card always takes me quite a bit of time, but then
I can make additional ones pretty quickly after that. I’m always
in need of birthday cards, so I decided to pair up the NEW CL-D187
Celebrating You sentiment with my favorite butterfly from DeNami Design.

Once I decided on my layout, these cards were very
simple to put together. I took an A2 white card base and stamped the J16
Small Splatter image in the upper-left and lower-right corners. I
die-cut two stitched rectangles (one from patterned
paper and one from white cardstock). On the white panel, I stamped the
butterfly, the little swirl and the sentiment and then used markers to
add some simple brushes of color to the butterfly. I layered the stamped
panel to the patterned paper, placing some
silver thread in between. I die-cut a file folder tab from polka dot
paper and adhered that to the back of my layered panels. I attached the
focal point to the card front and added some sparkle with a glitter pen.

Here’s a look at the same card in two additional colors:


I had so much with this project and can’t wait to snail mail these cards to several friends who have Springtime birthdays!!
Thanks for visiting!
DeNami Design Supplies:
Stamps:
NEW CL-D187 Celebrating You,
CL-GD001 Fancy Flutters,
PF51 Leaf Accents Stamp Set,
J16 Small Splatter
Other Supplies:
Dye Ink, Copic Markers, Glitter Pen, White Cardstock, Patterned Paper, Dies, Silver Thread, Adhesive

Sunday, January 10, 2016
Sneak Peek Week- Day 3 Fancy Florals and Giveaway!
Sneak Peek Week- Day 3 Fancy Florals


Hi Friends!
Welcome to Day 3 of the Sneak Peek Week. Today our theme is Fancy Florals. We have a gorgeous collection to showcase AND giveaway! This collection is so versatile and easy to use. Great for weddings, showers, spring cards, Easter, Mother's Day and just about any occasion! You can create a simple and elegant card or one with lots and lots of layers. As usual, the red rubber is deeply etched for crisp image quality.
Scroll down to see all the lovely cards the design team created. Be sure to visit their blogs and see how they created these love projects. Leave them a comment to let them know you stopped by! They would appreciate that.
Be sure to check back tomorrow for more sneak peeks and ideas. Thanks for stopping by!
Be sure to enter the Facebook Giveaway HERE.


DeNami Supplies:
Stamps: J157 Flower Filigree Trio
C123 Little Leaf Filigree
D186 One of a Kind
Paper: PC21 White Cardstock

.........................


DeNami Supplies:
Stamps: CL-J157 Flower Filigree Trio

......................................
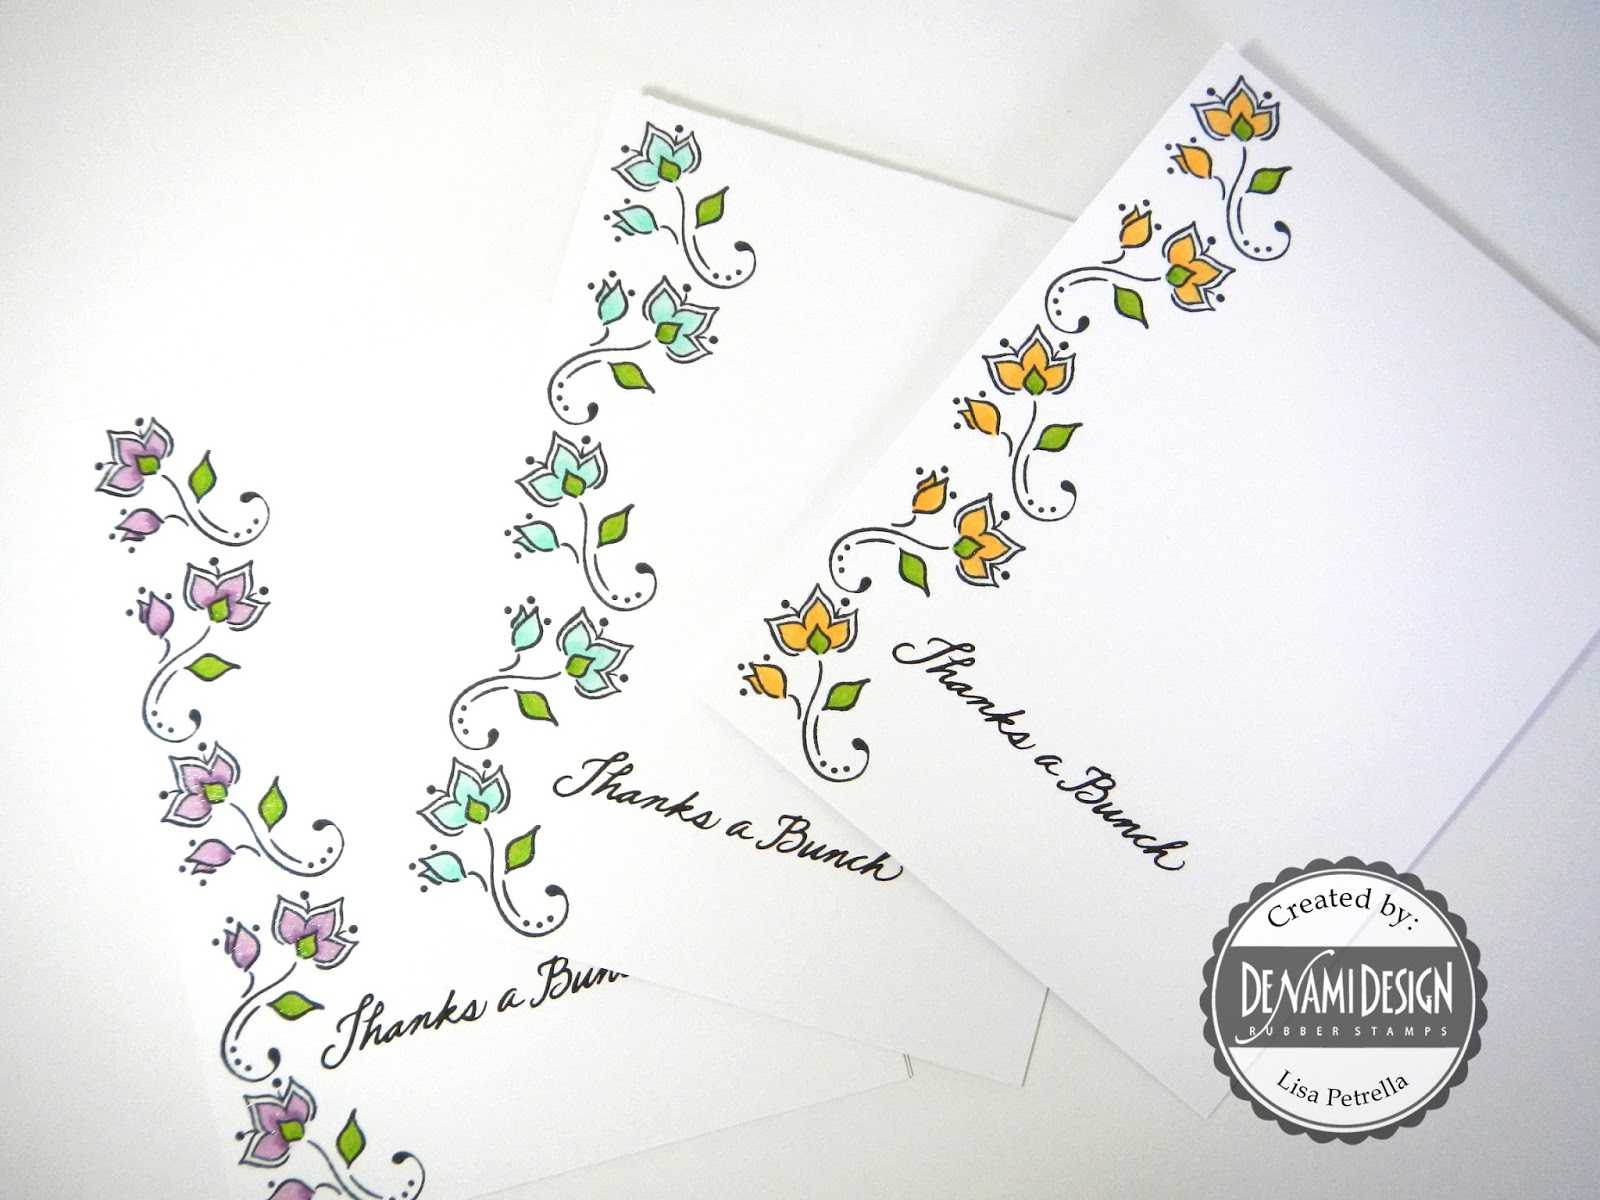

DeNami Supplies:
Stamps: CL-E204 Flower Filigree

..............................................


DeNami Supplies:
Stamps: CL-E204 Flower Filigree
Stamps: CL-E204 Flower Filigree
CL-C123 Little Leaf Filigree
CL-J157 Flower Filigree Trio

................................


DeNami Supplies:
Stamps: J157 Flower Filigree Trio
E204 Flower Filigree
C123 Little Leaf Filigree
D187 Celebrating You
C123 Little Leaf Filigree
D187 Celebrating You

.................................................
Subscribe to:
Posts (Atom)

Follow Us

 |
 |
 |
 |
 |


